Dash simplifies the process of building interactive and visually appealing web applications by allowing you to write your entire application in Python, a language already familiar to many data scientists and analysts.. And best of all it all runs in your browser. Combined with Docker Desktop we will show the power of using Redis as an in-memory database along with Dash.
The goal of this post is to show how to set up a Dash application with a desktop icon that will always be running locally. Perhaps in another post we will show how to set up a Dash app on a cloud server so stay tuned for more posts!
If you haven't got Docker installed you can follow this guide on setting it up for windows.
Making a Desktop Icon for our App
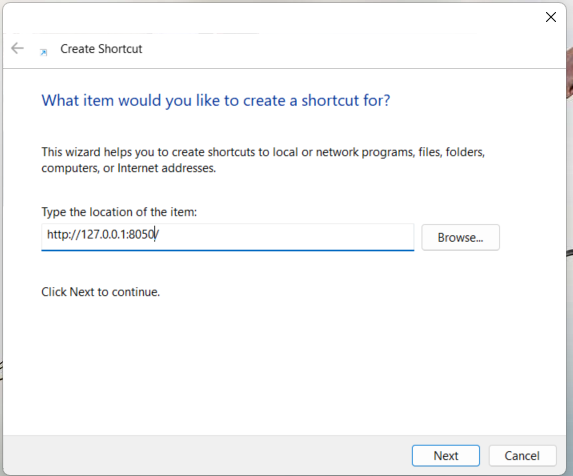
Ok so for those with a little bit of experience with Dash you will know that by default when running locally , you can view the application at 0.0.0.0:8050 by default. Although this would get pretty annoying always having to open your code editor or type in the url every time you want to access the application. On Windows this is very easy indeed to do.
All you need to do is right click on your desktop and then click on 'New' and then 'Shortcut' and you will enter a dialogue box as shown below.
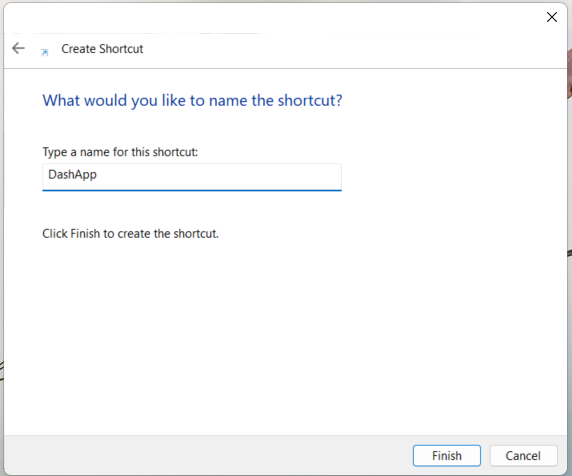
Once you have clicked on Finish and named your app appropriately you will see an icon on your screen that looks something similar to the image below.

Ok great, that means we will be able to access our Dash application simply by clicking a button on the desktop.
Writing a Simple Dash Application
For illustrative purposes now we will build out the basics of an application to show how easy it is to set up a Dash app that acts as a desktop application. Ensure you have the following folder structure as shown below.
DashApp
├── reader
│   ├── Dockerfile
│   └── app.py
├── writer
│   ├── Dockerfile
│   └── writer.py
└── docker-compose.yml
Essentially we will be combining two applications with redis being the glue that binds them together. The writer app, will write some data to Redis, which will then be read by that Dash application and updated every second.
Let's start with the writer folder, in which we need two files, the first of these is a python script shown below which will write a sequence of random integers in to Redis every second.
#writer/writer.py

import redis
import time
import random
import json

def main():
    client = redis.Redis(host='redis', port=6379, db=0)
    counter = 0

    while True:
        numbers = [random.randint(0, 10) for _ in range(50)]

        client.hset(name='random', key="nums", value=json.dumps(numbers))
        counter += 1
        print(f"Counter updated to {counter}")
        time.sleep(1)

if __name__ == "__main__":
    main()
And the Dockerfile which should be located in the writer directory is shown below :
FROM python:3.9-slim

WORKDIR /app

COPY writer.py .

RUN pip install redis

CMD ["python", "writer.py"]
This will push a new set of random numbers in to Redis every second, next we need to create the Dash application in order to retrieve the values every 1 second and display them in the dashboard.
#reader/app.py
import dash
from dash import html, dcc
from dash.dependencies import Input, Output
import redis
import json
import plotly.graph_objs as go

# Initialize Redis client
redis_client = redis.Redis(host='redis', port=6379, db=0)

app = dash.Dash(__name__)

app.layout = html.Div([
    html.H1("Redis Random Numbers"),
    dcc.Graph(id='numbers-graph'),
    dcc.Interval(
        id='interval-component',
        interval=1*1000,  # in milliseconds
        n_intervals=0
    )
])

@app.callback(Output('numbers-graph', 'figure'),
              Input('interval-component', 'n_intervals'))
def update_graph(n):
    numbers = redis_client.hget('random', 'nums')
    if numbers:
        numbers = json.loads(numbers)
    else:
        numbers = []

    figure = {
        'data': [
            go.Scatter(
                y=numbers,
                mode='lines+markers'
            )
        ],
        'layout': {
            'title': 'Random Numbers'
        }
    }
    return figure

if __name__ == '__main__':
    app.run_server(host='0.0.0.0', debug=True)
And the corresponding Dockerfile
FROM python:3.9-slim

WORKDIR /app

COPY app.py .

RUN pip install dash redis

CMD ["python", "app.py"]
All that is left now is to create a the docker compose file.
What is a Docker Compose File?
A Docker Compose file is a simple text file that defines how to set up and run multiple Docker containers together. It specifies the services, networks, and volumes needed for your application, allowing you to start everything with a single command. Think of it as a recipe for running your entire app stack in Docker.
version: '3'

services:
  redis:
    image: redis:latest
    container_name: redis
    ports:
      - "6379:6379"

  writer:
    build: ./writer
    container_name: writer
    depends_on:
      - redis

  dash_app:
    build: ./reader
    container_name: dash_app
    ports:
      - "8050:8050"
    depends_on:
      - redis
Ok so the first of the three services above is Redis, which will create a Redis database that sits in memory. Redis is incredible for many reasons, I would say the speed of loading the data and the relative ease in comparison to SQL databases ranks up there at the top! The Dash development team mention Redis multiple times in the docs so try to use it in your app when possible.
So line by line in the docker compose the explanation of each part is as follows:
- redis: The name of the service.
- image: Specifies the Docker image to use for the service. In this case, it's
redis:latest, which means it will pull the latest version of the Redis image from Docker Hub. - container_name: Sets the name of the container to
redis. - ports: Maps port 6379 on the host machine to port 6379 in the container, making Redis accessible on
localhost:6379.
Next we need to include the writer directory, here we need to ensure that Docker knows where to find the Dockerfile, notice that we only point it to the directory 'writer' and docker knows to look in here for the Dockerfile we have created in that folder.
- writer: The name of the service.
- build: Specifies the build context for the Docker image. It indicates that Docker should build the image using the
Dockerfilelocated in the./writerdirectory. - container_name: Sets the name of the container to
writer. - depends_on: Indicates that the
writerservice depends on theredisservice. This means that Docker Compose will start theredisservice before starting thewriterservice.
And last but certainly not least we need to include the actual dash app for displaying our data from Redis.
- dash_app: The name of the service.
- build: Specifies the build context for the Docker image. It indicates that Docker should build the image using the
Dockerfilelocated in the./readerdirectory. - container_name: Sets the name of the container to
dash_app. - ports: Maps port 8050 on the host machine to port 8050 in the container, making the Dash app accessible on
localhost:8050. - depends_on: Indicates that the
dash_appservice depends on theredisservice. This means that Docker Compose will start theredisservice before starting thedash_appservice.
How to start a Docker Compose Application from the Command Line?
Without much further ado let's run the application and then explain the commands. Ensuring you are in the main directory (DashApp) if you are following along with this tutorial , then all you need is to type the following command in your terminal:
docker compose up -d --build
If you see the following error:
no configuration file provided: not found
This indicates that you are in the wrong directory, ensure you change directory to the same level as your docker-compose.yml is located.
It may take a few seconds for Docker to create the images and get the container running, but as long as you don't see any error messages things are working as
The docker compose up command is used to create and start Docker containers as specified in a docker-compose.yml file. This command looks at your docker-compose.yml file and starts all the services defined within it, setting up the application as a whole.
-d
The -d flag stands for "detached mode." When you run docker compose up -d, Docker starts the containers in the background and returns you to the command prompt. This allows your terminal to be free for other tasks while your containers continue to run.
--build
The --build flag forces Docker Compose to build the images before starting the containers. This is particularly useful when you've made changes to the Dockerfiles or the application code and want to ensure that the latest version is used.
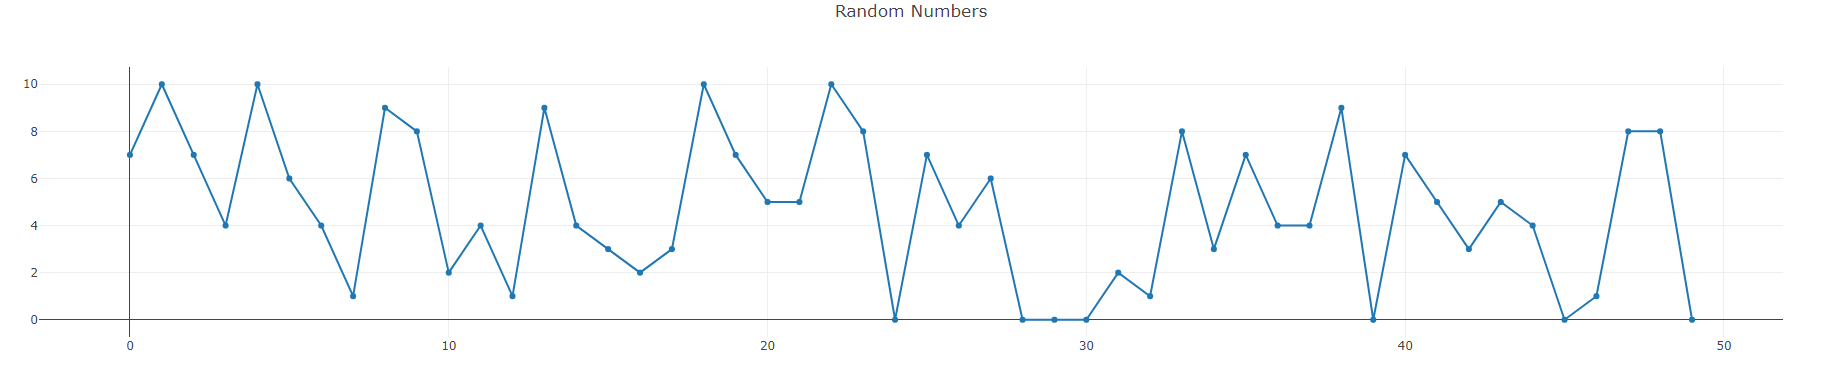
If all is successfull you should see an animated plot that updates every second that looks something like the image below
How to Stop a Docker Compose Application?
If you followed our tutorial on Docker Desktop for Windows, you have two options
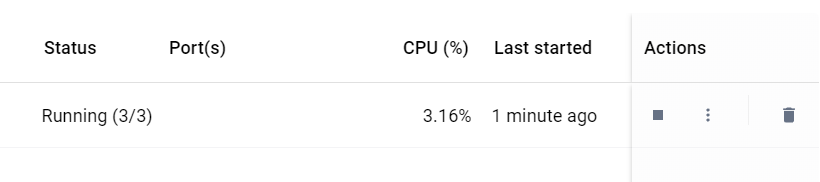
Open your Docker Desktop application and click on the stop button as shown below
Or if you prefer to do things throught the command line you can simply type
docker compose down
Ensuring you are in the same directory as when you started the application.
How to Ensure the Python Script Starts When Computer is turned on?
There are many problems associated with this method, but an easy way to ensure that the app will start as soon as your PC is turned on is to leverage Docker's restart policy. We can simply add to each container a restart policy that specifies it should always be restarted. The necessary changes to the docker-compose.yml is shown below.
version: '3'

services:
  redis:
    image: redis:latest
    container_name: redis
    ports:
      - "6379:6379"
    restart: always

  writer:
    build: ./writer
    container_name: writer
    depends_on:
      - redis
    restart: always

  dash_app:
    build: ./reader
    container_name: dash_app
    ports:
      - "8050:8050"
    depends_on:
      - redis
    restart: always
If we run the docker compose up -d --build command again, then this container will always be restarted, even if it is stopped, so I guess you should be careful with it!