In this post we will cover efficient ways to transfer large files and folders that contain many files from local machine to a remote server and vice versa. Often times, this can take an inordinate amount of time if not done correctly. We will show how to do this with both winscp and also using the Linx rsync command. Transfering files is a large topic in cloud computing, here we just give a brief overview for Windows users on how to achieve faster file transfers.
Why would you want to Store Data on Cloud?
🌍 1. Accessibility from Anywhere
Storing data in the cloud means you can access it from any device, anywhere in the world — as long as you have internet. Whether you're working from home, traveling, or collaborating with a team across time zones, cloud storage makes everything available on-demand.
🛡️ 2. Data Backup & Disaster Recovery
Hard drives fail. Laptops get stolen. Accidents happen. Cloud storage offers a layer of protection — your data is automatically backed up and, in many cases, stored redundantly across multiple data centers. That means if your local copy is lost or corrupted, you can easily recover your files.
🔗 3. Storing Data from External APIs
When working with external APIs — whether it's pulling stock prices, weather data, social media metrics, or user analytics — you often want to persist that information for later analysis, reporting, or backup.
Using WinSCP
Let's take two scenarios, one in which we have a folder that has 5 files which total disk space sums to 3 gigabytes worth of data. We have another folder, in which we have 300,000 csvs which totals the same 3 gigabytes worth of data. We might expect the download / upload times to be similar for both, but if you have ever tried it you will know that the folder with 300k files will take substantially longer, sometimes upwards of 24 hours!
Why is this?
Well, when you're dealing with loads of small files — like 300,000 CSVs — every single file needs to be listed, opened, transferred, and closed. That’s a lot of overhead. Each of those operations adds time, especially over a remote connection. WinSCP (and really most tools) have to negotiate every file individually, and that adds up fast. So even though the total data size is the same, the sheer number of files creates a massive slowdown.
So what is the solution?
First we will take an example of downloading a folder, from a remote server to our local machine.
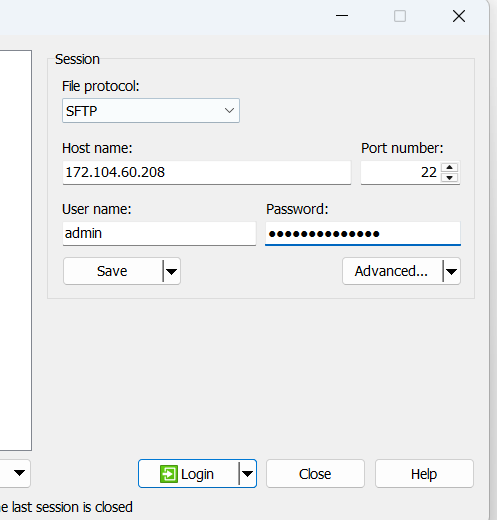
First log in to the server with wincp
I have created a test folder called data in which there is a csv_ouputs sub directory with many 1000s of csv files

Even just calculating the directory size as shown below will take a long time, so we need a better solution.

So basically we want to be able to download this to our local machine. If we were just to drag and drop the entire folder from the virtual machine to our local machine, it will take literally forever just to get the data transferred.
First ensure you have zip installed on your virtual machine
sudo apt update && sudo apt install zip
So the solution here is to zip the folder from the server ,and then download it again with Winscp.
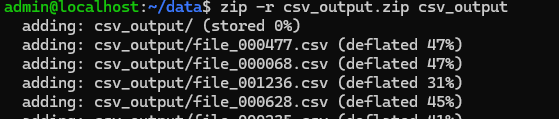
I am currently in the data directory on my virtual machine and simply run the zip -r command to make a zipped copy of the csv folder which will be much easier to download.
zip -r csv_output.zip csv_output
Then when I return to wincp UI , I can download this .zip file

And we see that it estimates that it is less than 3 minutes to download the entire zipped folder! A massive improvement!

The same thing obviously applied when uploading with winscp. However, below we will show another method for Linux users and those on WSL. For those that don't have WSL it is highly recommended for those that are getting in to cloud computing.
Uploading Files with Rsync
Rsync I usually find more useful when uploading files — this is a powerful command that will enumerate the specified folder both locally and on the virtual machine and upload files efficiently.
It’s especially helpful when dealing with large datasets, like tens of thousands of files or several gigabytes of content. Rather than re-uploading everything from scratch, rsync compares what already exists on the destination and only transfers what’s changed — saving time, bandwidth, and frustration. Rysnc really is a must know command for cloud computing.
For this I highly recommend setting an alias for SSH which will make rysnc commands so much easier, rather than typing out the ip and username every time you want to transfer files.
OK first off here is the command I have recently used to transfer a folder called 'zipped' to my server where my username is admin and the destination folder on the server is at my home directory
rsync -azP --inplace --no-compress --whole-file --stats ./zipped/ my_server:/home/admin/zipped/
Ok so also note here, that my_server is an alias for my ssh key , if you don't have this set up you will need to replace this with username@127.0.0.0 i.e. user and host name.
So the generic command to sync a large number of these files is shown below, you will need to replace the variables in curly braces with the information relevant to your setup.
rsync -azP --inplace --no-compress --whole-file --stats ./{local_folder}/ {login_info}:{destination_folder}
Ok so it is important to note here that the zipped folder I am syncing contains about 100k zipped csv files (see more detail in flag breakdown below), and since these files are reasonable small I am choosing to just copy the entire file, you probably want to be careful with this if you are updating rather than writing fresh.
🏷️ Flag-by-Flag Breakdown
-a → Archive mode
This is a shorthand for syncing everything while preserving important file metadata.
-
Why we use it:
It ensures that file permissions, timestamps, symbolic links, ownership, and more are preserved. Perfect for keeping your destination a true replica of the source.
-z → Compress file data during transfer
This compresses data as it’s sent over the network.
-
Why we use it:
Saves bandwidth and speeds up transfers, especially useful over slower connections. (However, you later disable compression — keep reading!)
-P → Progress + Partial files
This is a combo flag equivalent to --progress --partial.
-
Why we use it:
It shows you real-time progress of each file being transferred and allows interrupted transfers to resume without starting over — really helpful for large files or unstable connections.
--inplace → Write updates directly to the destination file
Normally, rsync creates a temporary file and then renames it after the transfer.
-
Why we use it:
This writes changes directly to the file in-place, reducing disk usage and speeding things up when updating large existing files.
--no-compress → Disable compression for certain file types
Overrides the -z flag for already-compressed files (e.g. .zip, .gz, images, etc.).
-
Why we use it:
Compressing already-compressed files is wasteful and can even slow things down. This ensures we're only compressing where it actually helps.
--stats → Display detailed statistics after sync
-
Why we use it:
Great for visibility. You’ll see how many files were transferred, how much data was sent, speed, and other useful performance metrics.